While running several websites, it can be more useful to go with WordPress multisite network than managing a number of standalone WordPress sites:
- I can easily manage multiple sites from a single dashboard
- Other users can be added as admins with limited access only to a specific site
- New plugins and themes can be installed and activated for multiple sites at once
- Updates should be performed only on master installation and will be automatically applied for all websites in the network
- Each website or blog can be customized separately thus they are not limited by unified management
This implementation can be of a great use for various industries and types of organizations with own sites: media resources with a number of sections managed by different teams; government and non-profit sites for different departments or locations; educational organizations with sub-sites created by students; business website with sub-categories for different branches; private blogs on multiple subdomains, and others.
Multisite network is a built-in feature in WordPress that can be easily activated but at the same time it requires a set of configurations for proper work. In this article, we will describe how to create multiple websites, bind custom domains, issue SSL certificates and integrate CDN in a few minutes using a single WordPress installation.
Install WordPress and Enable Multisite Mode
- First of all, initiate master WordPress installation from Cloudjiffy Marketplace. This can be a cluster or standalone package.

- Enable the required Advanced Features including “Install WordPress Multisite Network” option and proceed to environment installation.
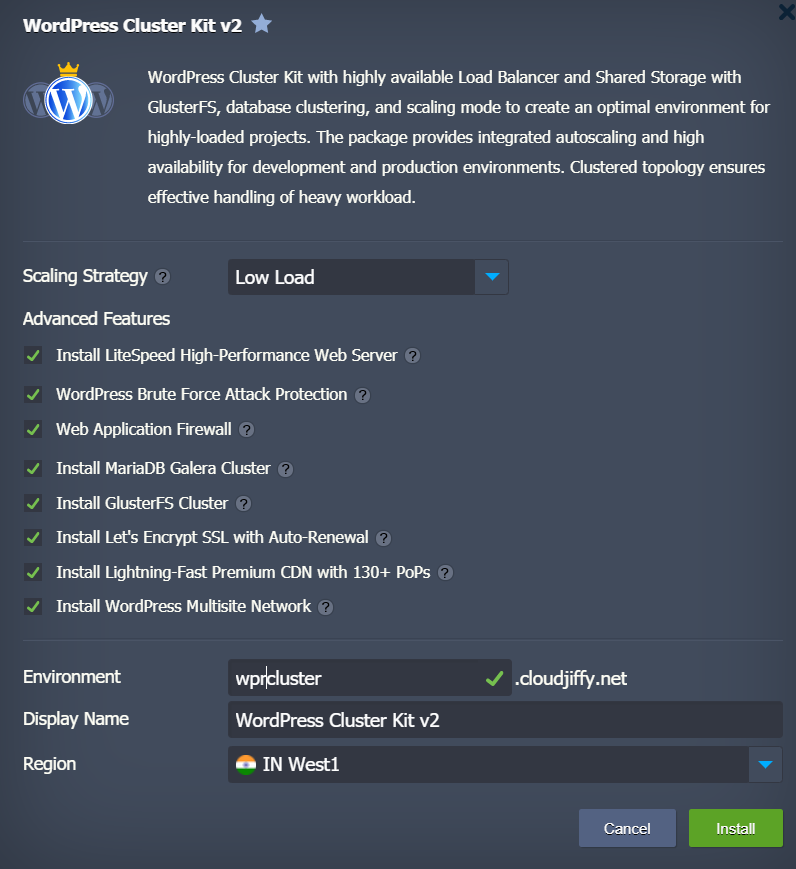
For this article, we create WordPress based on LiteSpeed servers and MariaDB Galera, as well as with enabled WAF, Let’s Encrypt SSL and Multisite Network.
Configure Multisite Network and Create Website
After installation, multisite mode is automatically enabled and the websites can be created in one of the following ways within a single network:
- sub-domains — a domain-based network in which on-demand sites use subdomains: site1.wprcluster.cloudjiffy.net,
site2.wprcluster.cloudjiffy.net - sub-folders — a path-based network in which on-demand sites use paths:
wprcluster.cloudjiffy.net/site1, wprcluster.cloudjiffy.net/site2
In this article, we will go with the sub-folders model for our WordPress multisite network subsites.
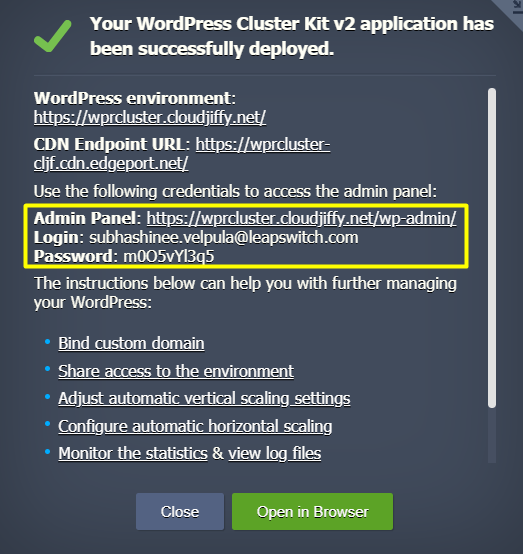
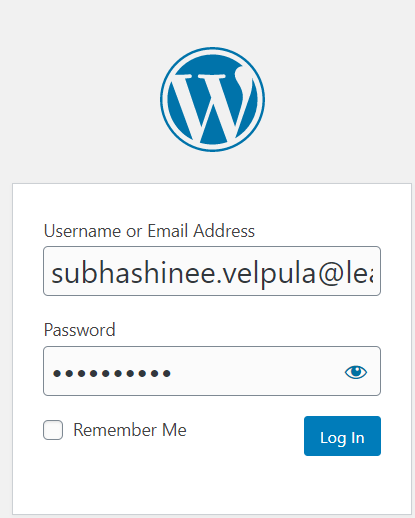
- Log in to my WordPress Admin Panel using the credentials from the post-installation email or WordPress successful installation window.
- Open My Sites > Network Admin > Sites page.
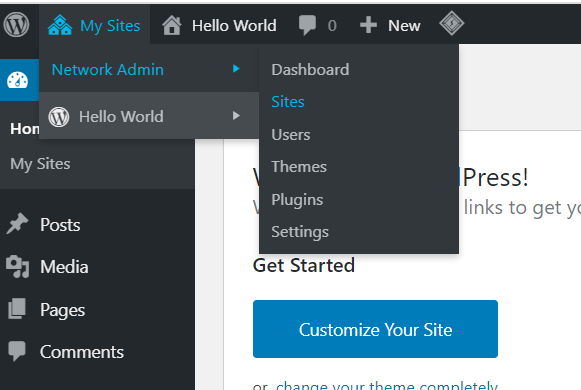
- This is the page with all sites of my WordPress Multisite Network. Now, there is the main site only created by default. Click on Add New.

- Fill out the form specifying the Site Address (URL), Title, Language and Admin Email. Click on Add Site.
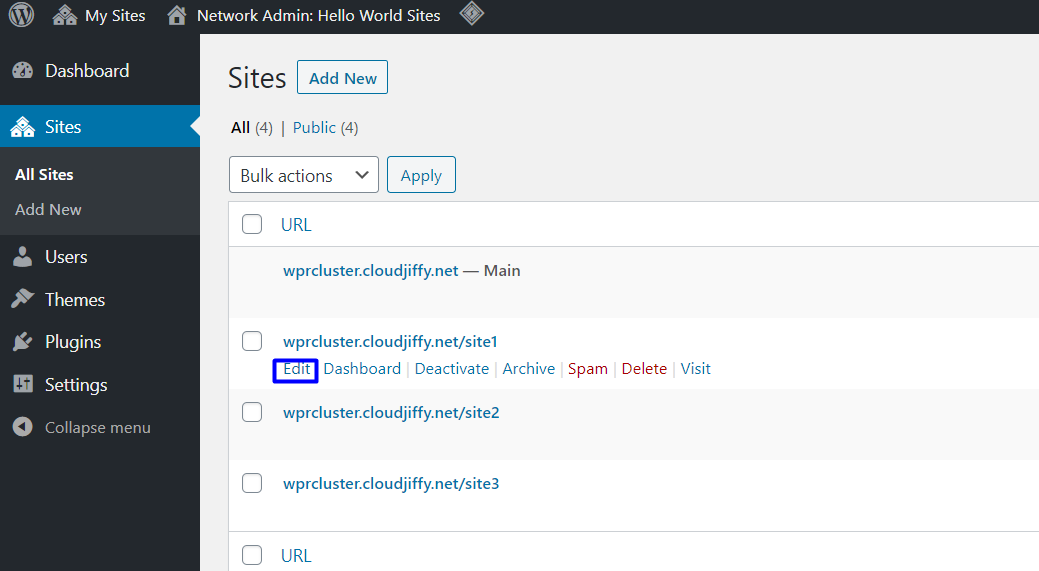
Congratulations! I have created and configured the first website within my WordPress Multisite Network. Repeat the same steps to create additional sites when required.
Bind Custom Domains to Websites in the Network
Below we’ll demonstrate how to map a custom domain to a default one in the multisite network.
For our example, we have registered three custom domains in cjiffy.website zone that will be mapped to three sites in the network like:
wprcluster.cloudjiffy.net/ /site1 -> multi1.cjiffy.website
wprcluster.cloudjiffy.net/ /site2 -> multi2.cjiffy.website
wpcluster.vip.cloudjiffy.cloud/site3 -> multi3.cjiffy.website
- In order to bind a custom domain (e.g. multi1.cjiffy.website) to a newly created site:
- create an A record for my custom domain that will map it to the public IP address of Load Balancer
- find the Let’s Encrypt Free SSL Add-On in the Load Balancer, press Configure button, add my custom domain to the list of registered domains for my web sites.
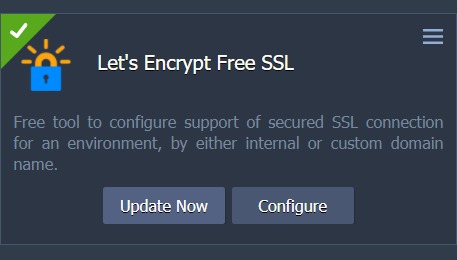

Note: Let's Encrypt has a set of limitations while issuing certificates. If they don't meet the requirements of my project, please consider using alternative SSL certificate authority.
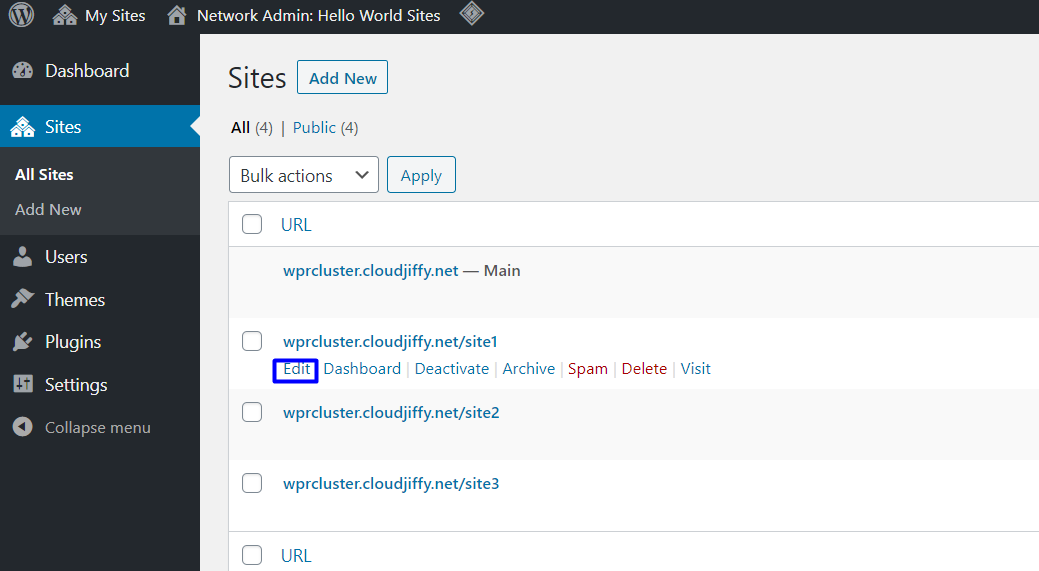
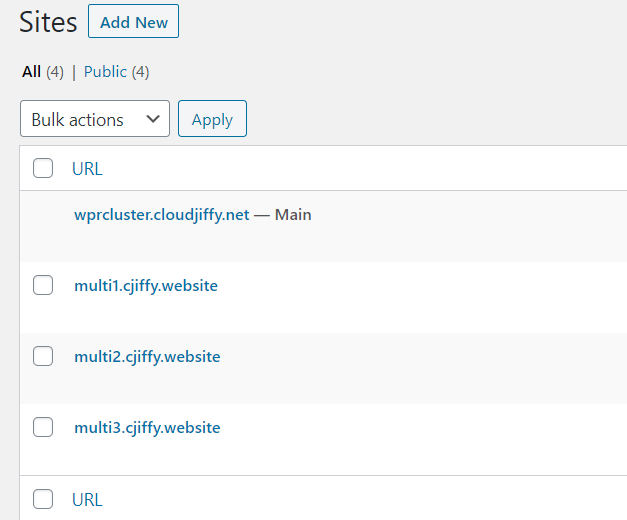
2. Go back to the list of the available sites and click on Edit next to the required one.
3. Change the Site Address (URL) with a custom domain multi1.cjiffy.website:
https://wprcluster.cloudjiffy.net/site1/ -> multi1.cjiffy.website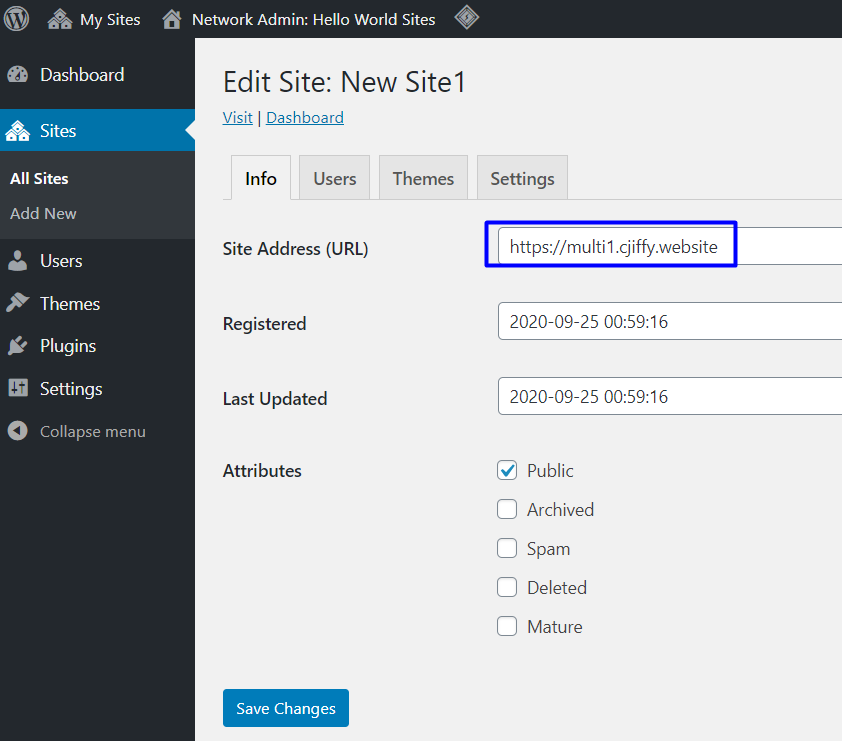
4. Press Save Changes. Repeat the same steps to bind domains for each required sub-site.
Enable CDN for Websites in the Network
Finally, I have to bind a CDN endpoint to each site of the just created network. It may be done in two different ways depending on what application server I chose at WordPress installation step.
- If I have LiteSpeed-based WordPress installation:
- Enter the dashboard of each site by clicking on the Dashboard menu item.
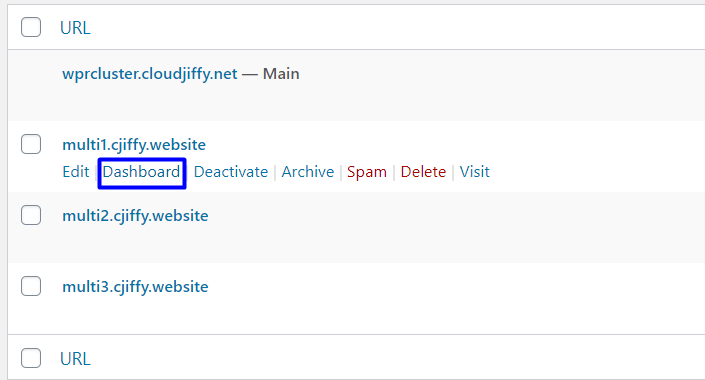
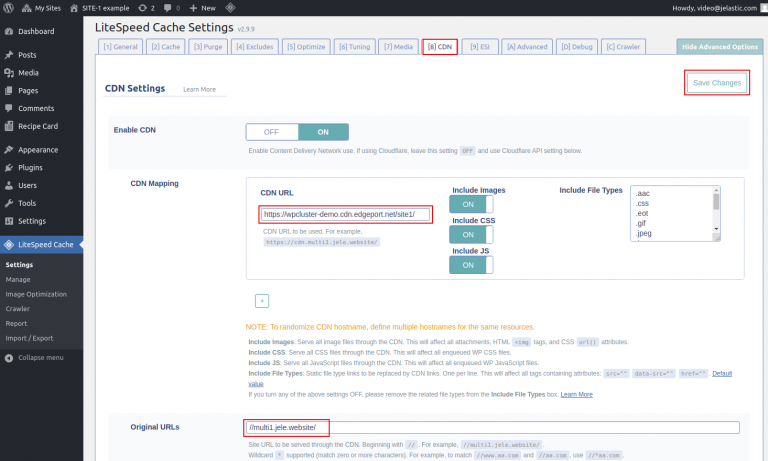
- Press LiteSpeed Cache and go to the CDN tab.
- Paste the CDN URL from installation email or success window, and website Original URL (domain I previously bound, in this format: //multi1.cjiffy.website). Click Save Changes.
- Repeat the same steps for each site in the network to bind a CDN.
2. If I have NGINX-based WordPress installation:
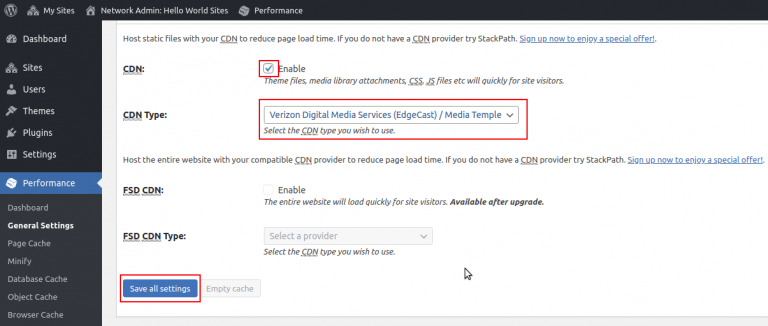
- Open Performance > General Settings > CDN within WordPress admin panel.
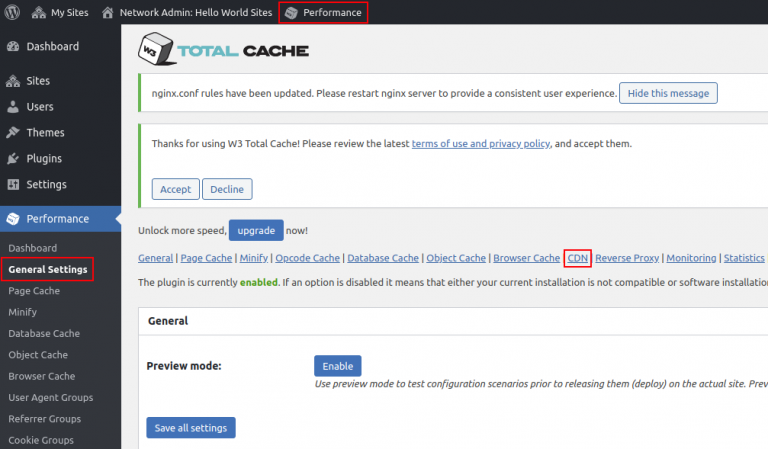
- Pick Enable checkbox for CDN, choose Verizon Digital Media Services (Edgecast) in CDN Type field and press Save all settings.
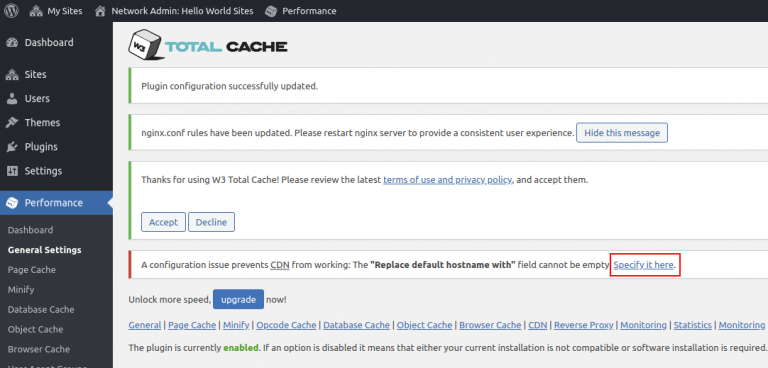
- After that, the warning will appear requiring fill out the “Replace default hostname with” field. Click on the link Specify it here.
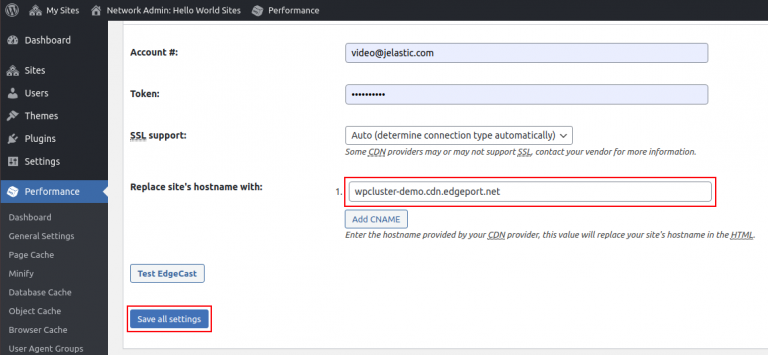
- Replace site’s hostname with CDN endpoint hostname I have obtained upon WordPress installation (e.g. wpcluster-demo.cdn.edgeport.net) and press Save all settings.
- Unlike the LiteSpeed-based installation, I do not have to configure CDN for each site. From now on all of the newly created websites in the network will be served by CDN.
Congratulations! My WordPress multisite network is configured inside a highly-available cluster, sub-sites are created with custom domains and enhanced by enterprise-level CDN. Enjoy a unified management of my websites and blogs using Cloudjiffy Multi-Cloud PaaS.