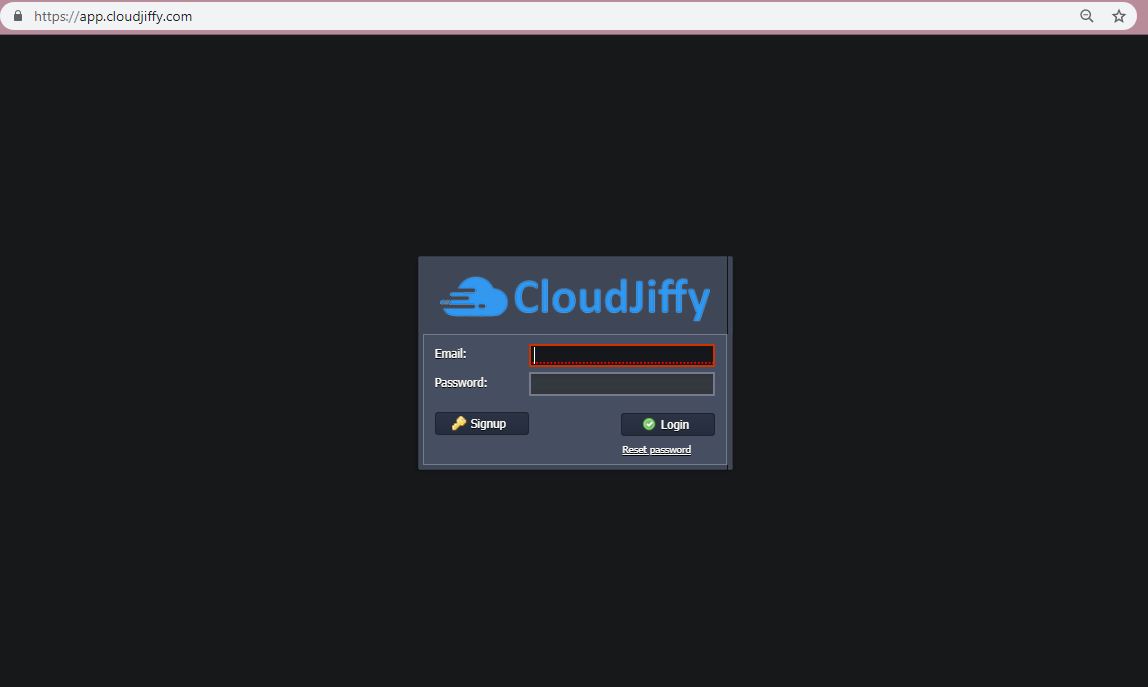
1. Login to your CloudJiffy Dashboard account
2. Click on Marketplace.

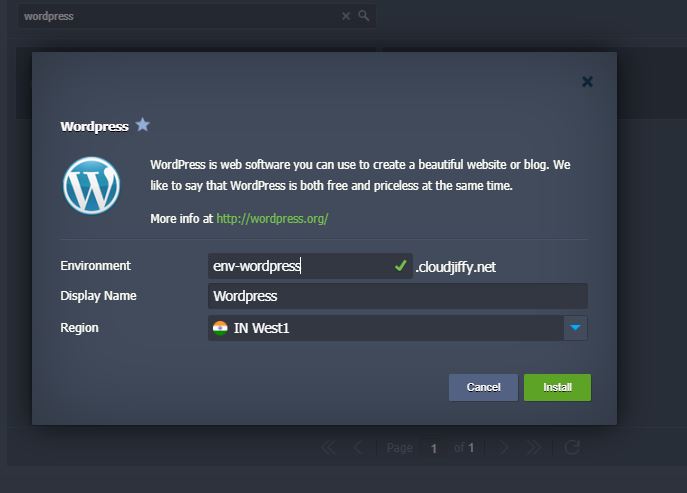
3. In Marketplace search for “WordPress” and then click on install.
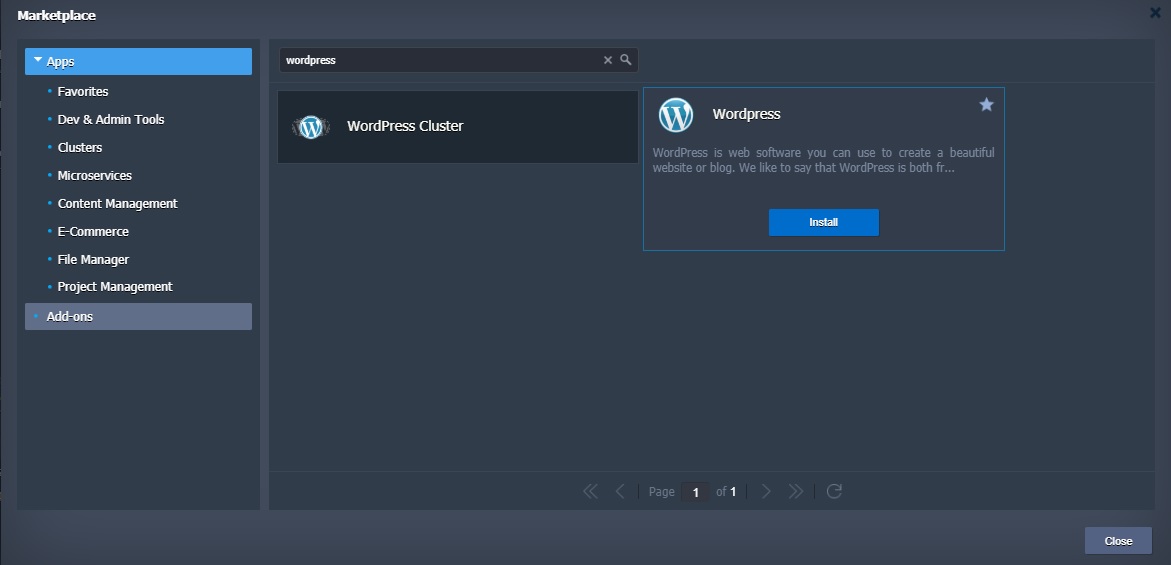
4. You can change your environment name and region.
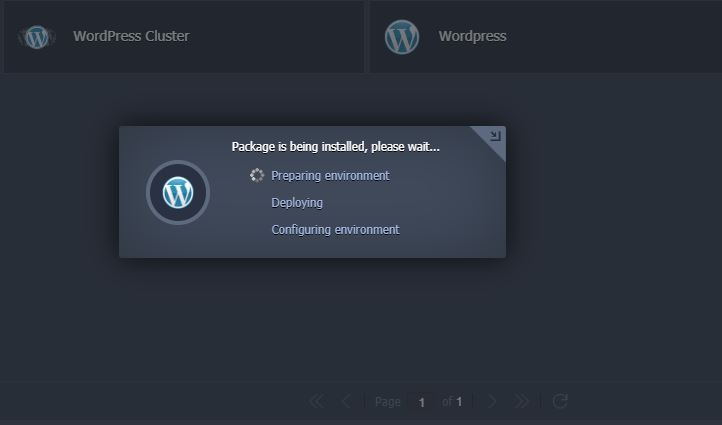
5. After clicking on “Install” it will display a waiting window.
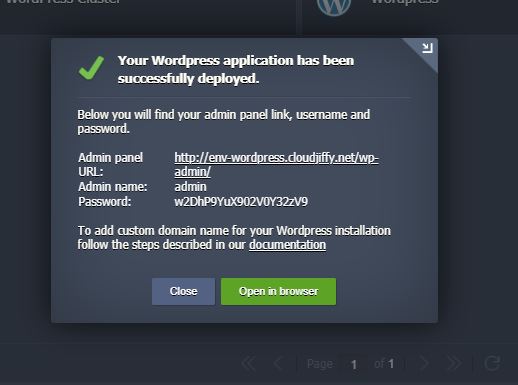
6. After completing installation a window will occur on your screen
7. By clicking on “Open in browser” it will open your WordPress website. You will also receive a mail-in which the phpMyAdmin login details and MySQL connect login details will be there.
Domain Name Binding and Updating A Record
1. Open your CloudJiffy dashboard and click on WordPress settings.

2. Goto the Custom Domains option. In Domain binding setting and enter your custom external domain (like eg:- www.mydomainname.com) that you want to bind with WordPress and click on Bind.
3. To update my ‘A’ record, go to your registrar and change it from DNS Management. Point my ‘A’ record to the public IP assigned to your environment. Also, point your www. CNAME record to domain.com.
4. Open a new browser and enter your custom domain name to the address bar. It will display the homepage of your application, indicating that the setup is done properly.
5. Login to your phpMyAdmin web and fill login information which was received on your email.
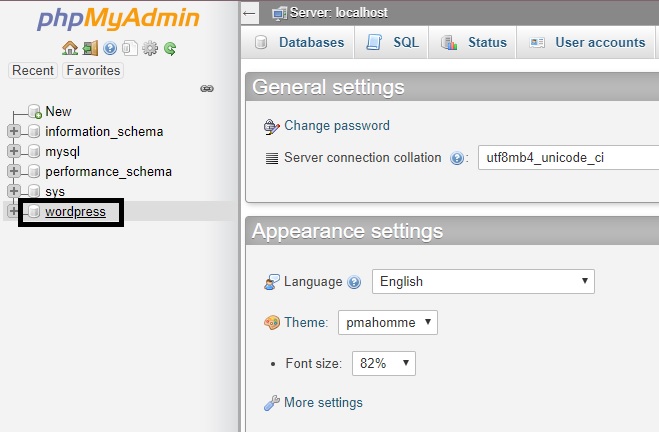
6. After login into phpMyAdmin click on “Wordpress”.
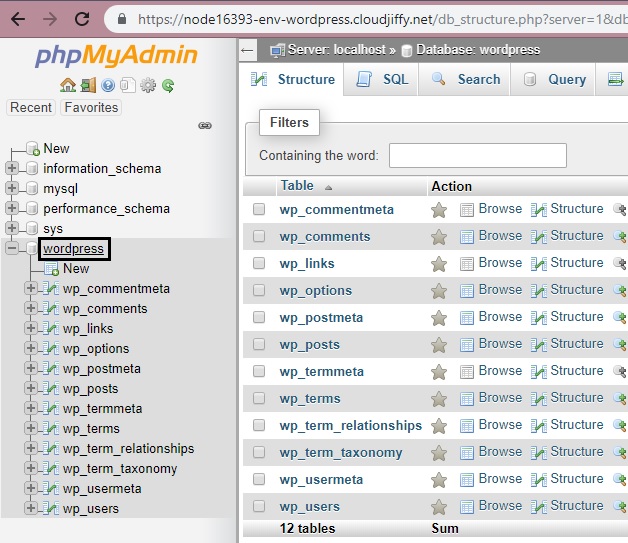
7. And then click on “wp_options”.
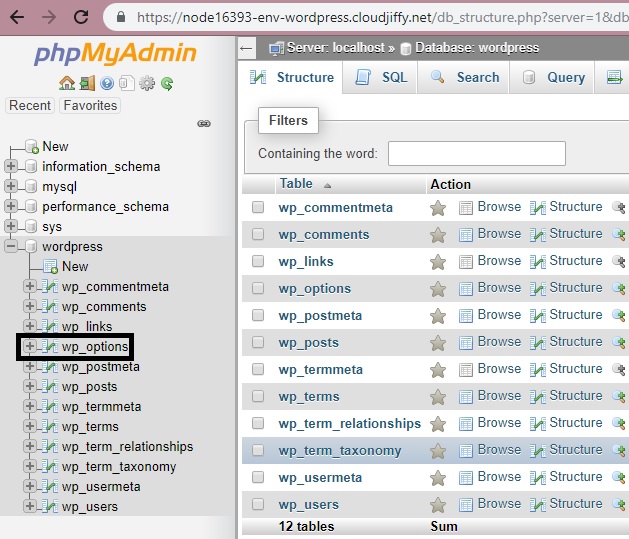
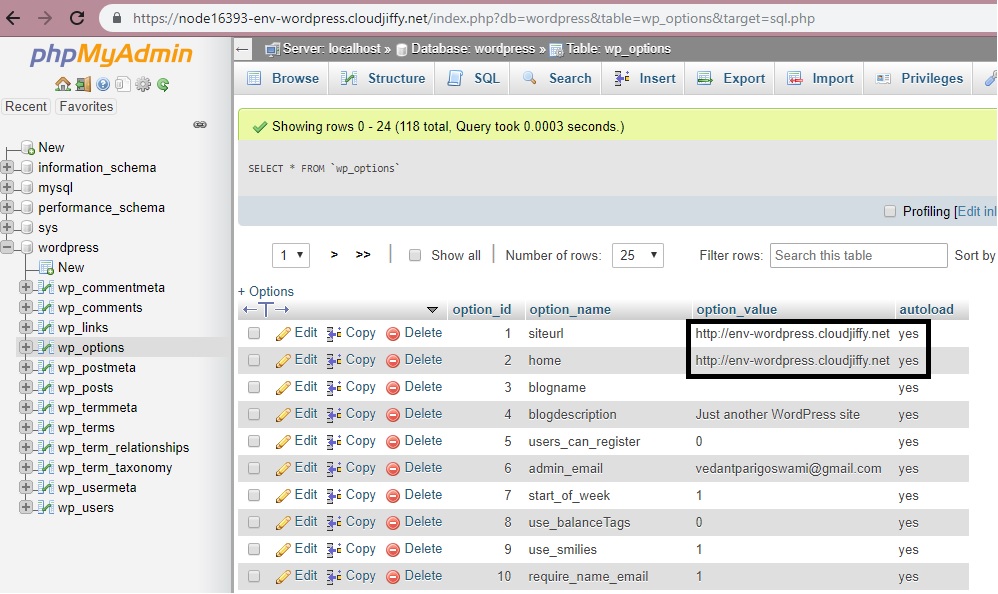
8. After clicking on wp_options you will see option_id, option_name, option_value and autoload status. Here you need to replace the option_value for siteurl and home with your custom domain name.
Restore Database and WordPress Website Content from Backup
A. Restoring the Backup Of WordPress Website Content :
1. Login to your CloudJiffy and take your cursor to Nginx, then click on config.
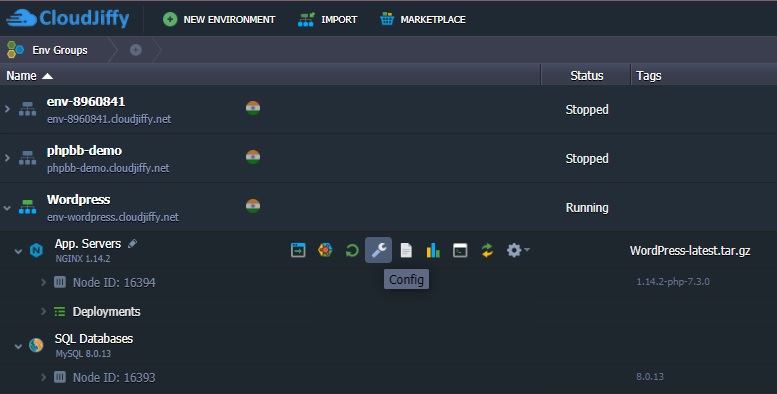
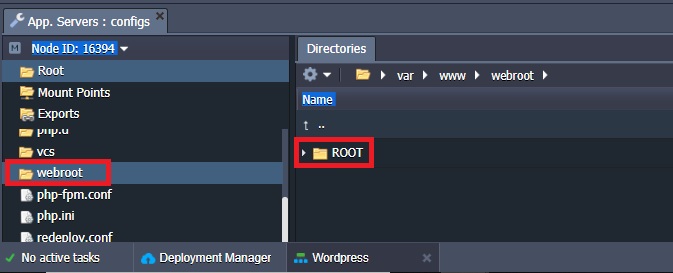
2. In Config go to webroot -> Root.
3. On ROOT click on Additional settings and click on upload.
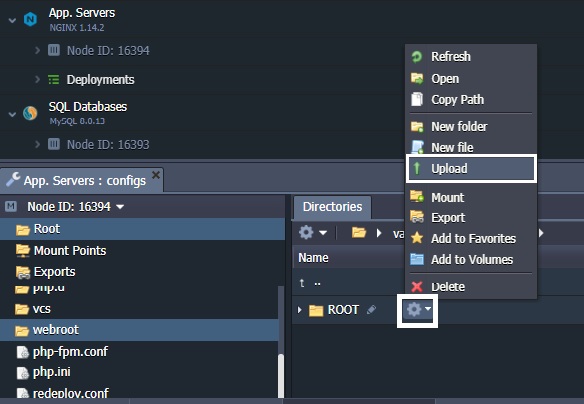
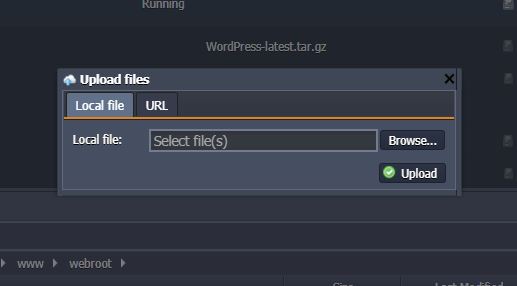
4. After Clicking on upload an interface of Upload Files will open, where you can browse and upload your files from Local Folder or you can also insert the link and then click on Upload.
B. Restoring the Database :
1. Login to your phpMyAdmin.
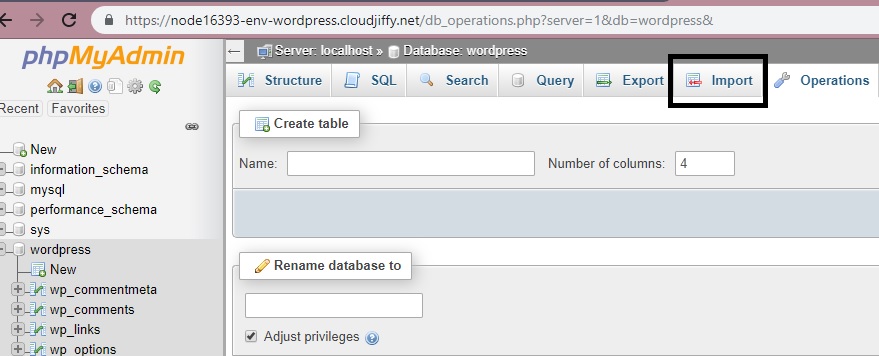
2. Click on Import:
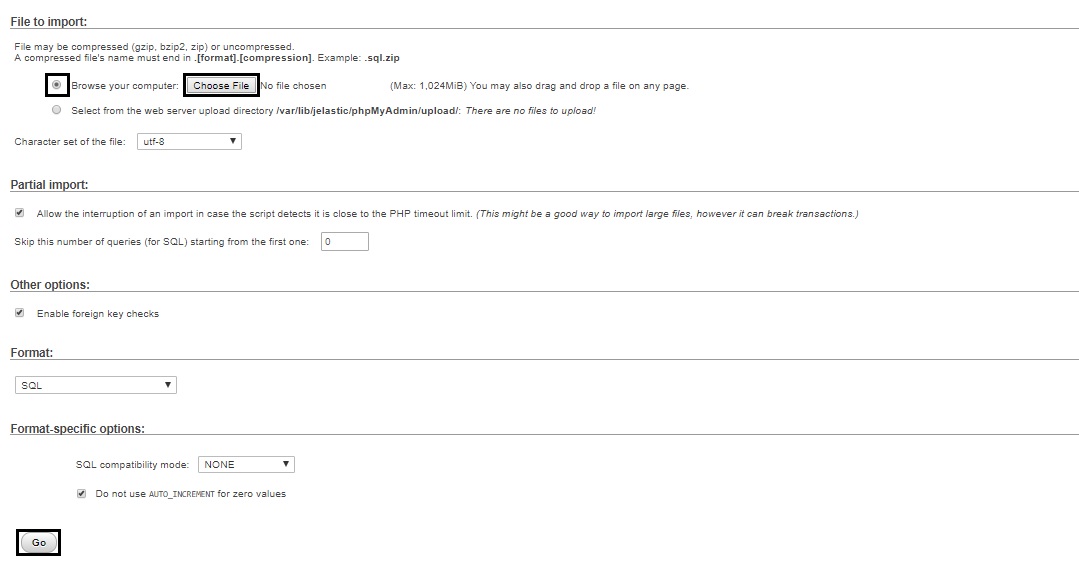
3. Select “Browse my computer” Click on the “Choose File” tab to select a path for your file, after selecting the file path click on “GO”.
4. Goto your CloudJiffy Dashboard to update the connection string from the webroot -> Root – > scroll down and search for wp-config.php -> click on the settings tab on wp-config.php and select Open.
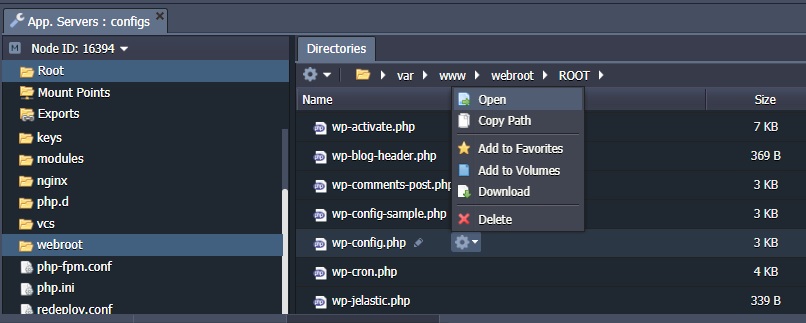
5. After clicking on open you will see connection strings. (Maximize the screen to see properly).
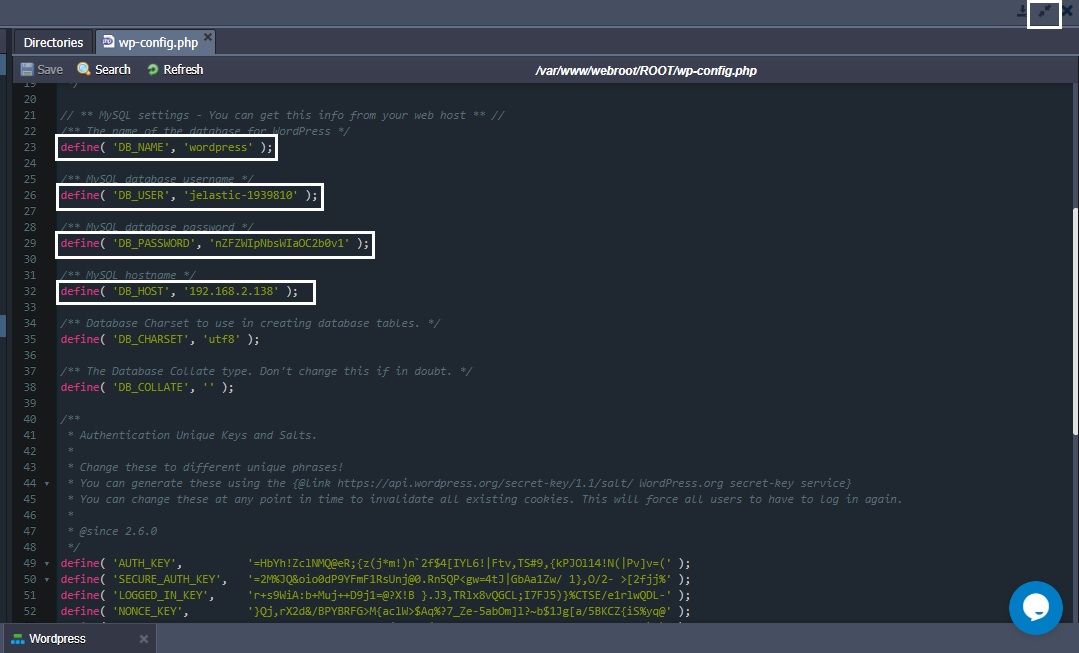
6. define( ‘DB_NAME’, ‘wordpress’ ) – Keep the DB_NAME as ‘wordpress’ only.
define(‘DB_USER’, ‘wordpress’) – Replace ‘jelastic’ with ‘root’.
define(‘DB_PASSWORD’, ‘TKz0Rfi1i9’) – Replace ‘nZFZWIpNbsWIaOC2b0v1’ with your phpMyAdmin password.
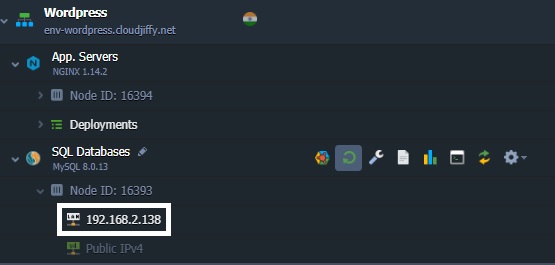
define( ‘DB_HOST’, ‘192.168.100.41’ ) – Replace ‘192.168.2.138’ with the MySQL node IP mentioned in your cloud application interface.
That's All!
