 WordPress is a highly popular open-source CMS, intended for creation of websites, blogs, and apps. This tutorial shows how to deploy a WordPress application into Cloudjiffy platform and configure it as a scalable cluster - such approach ensures high availability and reliability to strengthen your application.
WordPress cluster helps to handle permanent high load and huge load spikes, ensures zero downtime, improves performance, cuts maintenance costs, and, as a result, offers an excellent experience for end-users.
In order to get the most from your WordPress Cluster, the following benefits can be configured:
-
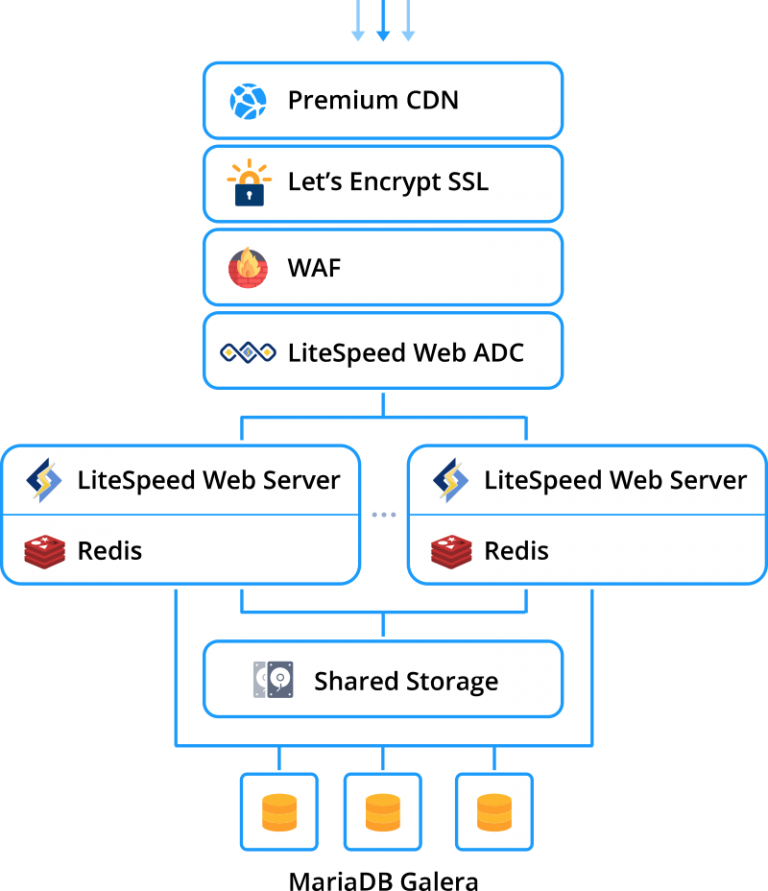
install a WordPress cluster powered by LightSpeed and a highly available MariaDB Galera cluster
-
enable a lightning-fast Premium CDN with support of HTTP/3 (aka QUIC)
-
get a free Let’s Encrypt SSL certificate with automatic renewal
-
bind a custom domain and update the certificate
-
scale dynamically based on the load
Why use it on CloudJiffy?
- Easy to manage
- One-Click Installation
- Charges based purely on consumption (Pay As You Consume pricing) Thus helps you save cost
- Real-time scaling with an increase in users
- Data replication and backup solution to keep your data safe
- Highly secure infrastructure
- Inbuilt CDN to cater to a worldwide audience
WordPress Cluster Automatic Installation
Normally, deploying a WordPress cluster is quite time-consuming and complex, but with Cloudjiffy, most of the work is done by the platform. Just a few clicks are needed to specify your preferences.
- If you have no Cloudjiffy account, Visit https://cloudjiffy.com and click on Free Signup for free 14 days trial and deploy the WordPress Cluster
The registered users can install WordPress Cluster Kit by importing the appropriate manifest.jps file from GitHub or from the Cloudjiffy Marketplace directly at the dashboard.

- In the opened installation window, you can customize your WordPress Cluster.
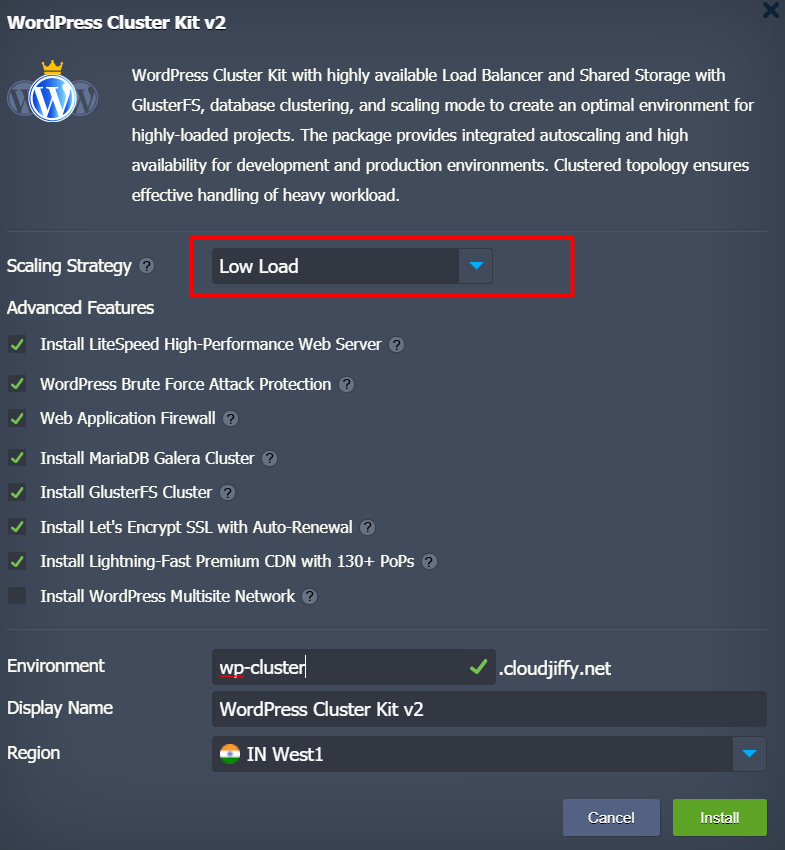
This Scaling Strategy parameter aims to foresee possible upcoming load growth in the cluster and scale out the application servers horizontally in order to prevent WordPress application downtime. Let’s take a look at how it works.
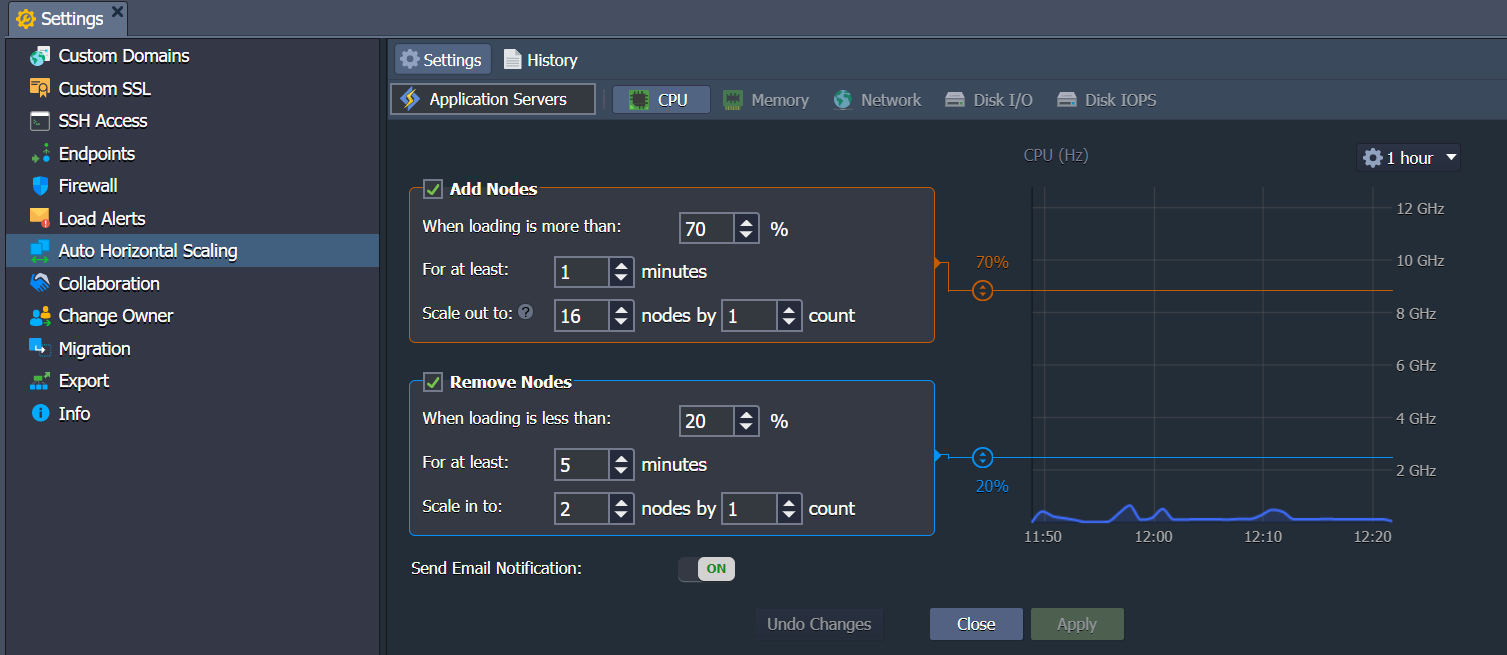
Cloudjiffy allows automatically scale in/out servers using specially configured triggers. Based on our experience, we offer three common scaling scenarios for WordPress to prevent overload (these settings can be adjusted after installation):
- Low Load
-
- adds 1 application server node if the workload is higher than 70%
- removes 1 application server node if the workload goes below 20%
- Medium Load
-
- adds 1 application server node if the workload is higher than 50%
- removes 1 application server node if the workload goes below 20%
- High Load
-
- adds 2 application server node if the workload is higher than 30%
- removes 1 application server node if the workload goes below 10%
- Activate the preferred Advanced Features.
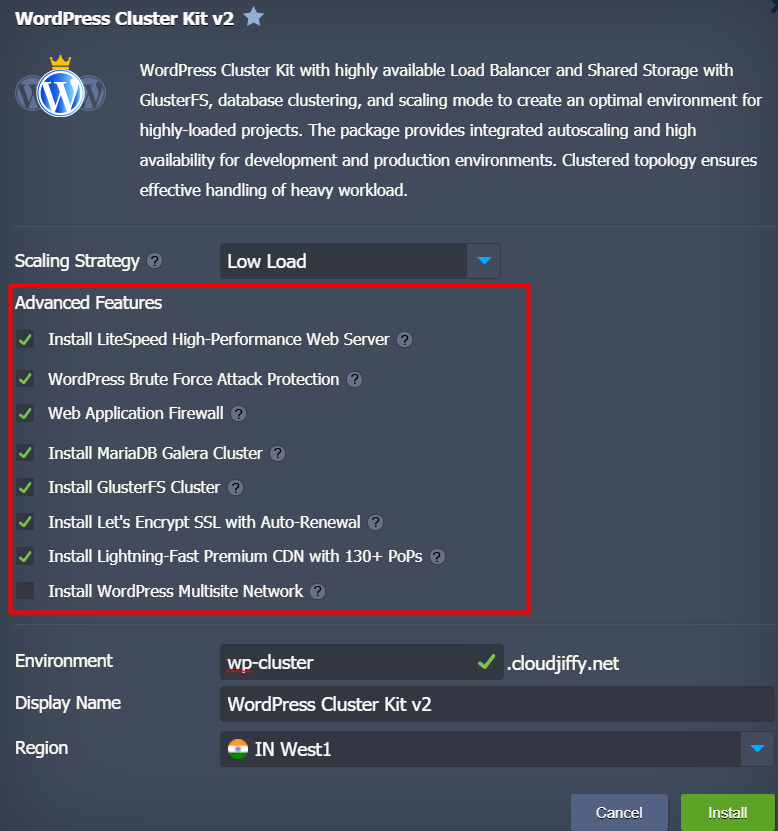
- LiteSpeed High-Performance Web Server installs cluster based on LiteSpeed Web Server and Web Application Delivery Controller. This option provides the highest possible speed of website content delivery to the clients via modern HTTP/3 protocol. In case you untick this option, the cluster will be installed using NGINX web server and load balancer.
- The Web Application Firewall (WAF) enables/disables the feature (works with the LiteSpeed Web Server only).
Note: It is not recommended to use LiteSpeed Web Admin Console to configure WAF since it will cause functionality failure during horizontal scaling. If you need to adjust Web Application Firewall after the installation, the appropriate WAF=TRUE/FALSE environment variable should be used.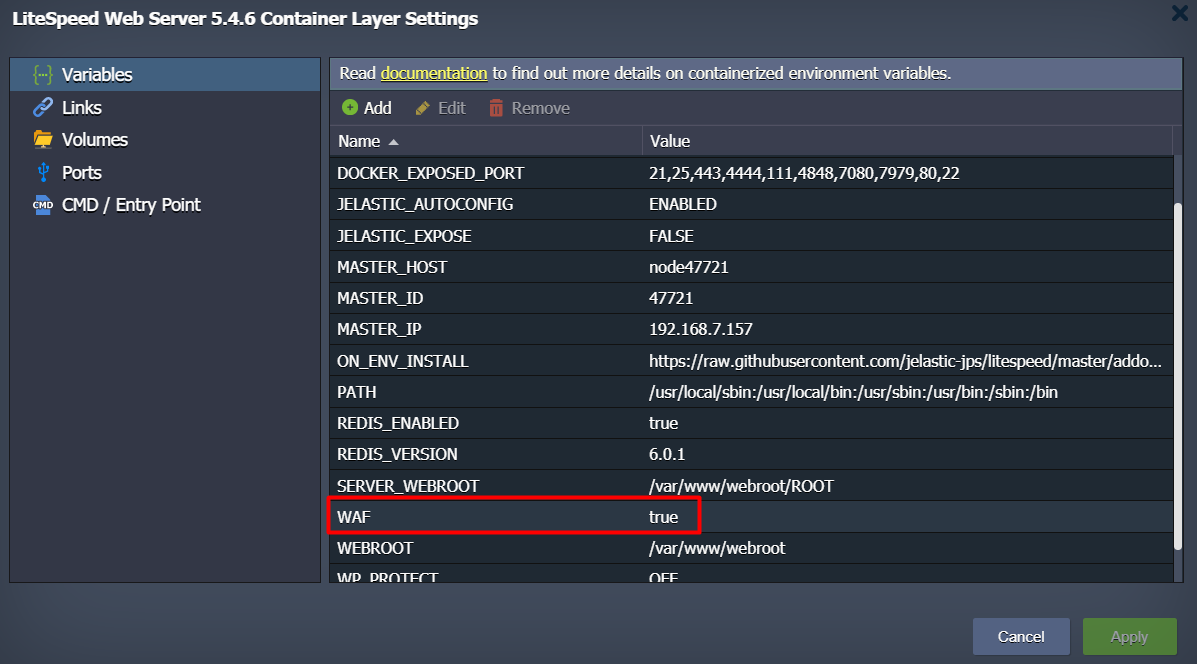
Don’t forget to restart the application layer nodes after changing the variable.
- MariaDB Galera Cluster is a multi-master database cluster based on synchronous replication and InnoDB engine. When using the Galera Cluster, you can perform direct read and write operations to any node. If any single instance goes down, there will be no cluster downtime and no complex failover procedures.In case you untick the checkbox, a regular standalone MariaDB database will be installed. Thus, high availability and failover capabilities will be significantly decreased.
Note: In case you are going to migrate an existing database to Galera Cluster, you have to take into consideration the following requirements:
- All tables must be of InnoDB/XtraDB type
- All tables must have a PRIMARY index
- Lightning-Fast Premium CDN with 130+ PoPs integrates Verizon Edgecast CDN into WordPress applications.
- Let’s Encrypt SSL with Auto-Renewal add-on allows to issue and use a trusted, free certificate for a custom domain. The built-in functionality employs periodical renewal to prevent certificate expiration. The appropriate notifications are sent by email.
- WordPress Multisite Network enables/disables the same-named feature. It allows the application to act as a WordPress network hub, where the network can comprise several websites. With this built-in feature and Cloudjiffy automation, you can create an independent network of websites and invite others to develop their sites on the same network even for commercial usage.
- Specify Environment name, Display Name, choose availability Region (if available) and click Install. Wait several minutes for Cloudjiffy to set up your WordPress Cluster.
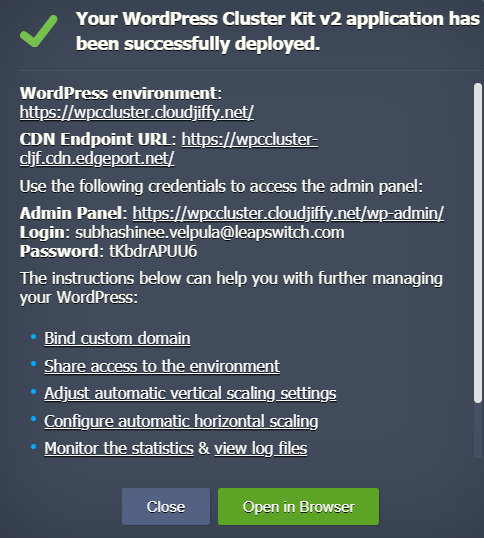
Use the links and credentials from the successful installation frame or from the appropriate email to manage your WordPress application (or even create a network).
Domain and SSL Certificate Configurations
For production, the environment should have a public IP address and custom domain that help to share information regarding your resource across the Internet.
In case the WordPress was installed with Let’s Encrypt SSL Add-On, the public IP address was added to the Load Balancer node automatically.
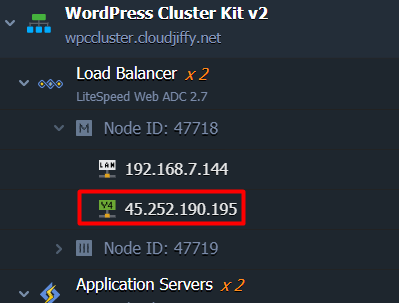
The next step is to bind a custom domain to the environment and issue a trusted SSL certificate for it.
- As for our example, create an A record for your custom domain that will map it to the public IP address attached to Load Balancer. If you are not familiar with this procedure, follow the steps in the linked guide.
- Then find the Let’s Encrypt Free SSL among the Load Balancer Add-Ons and click the Configure button.
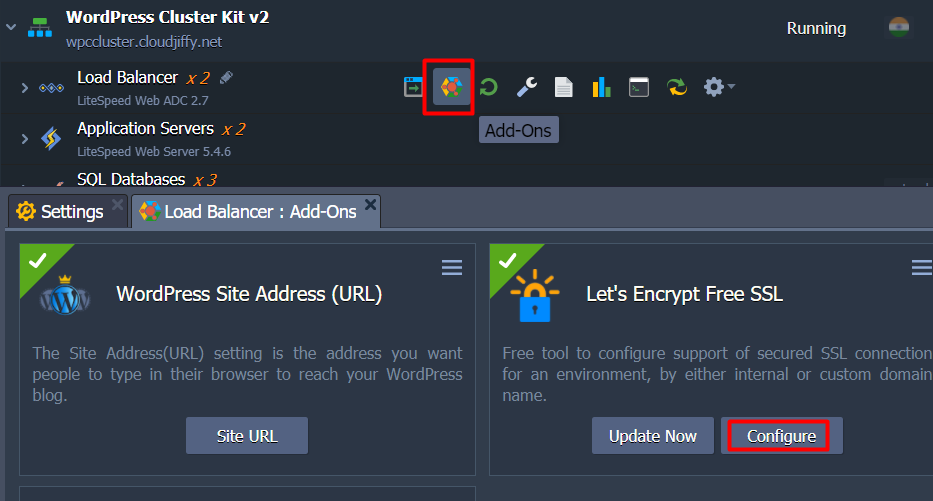
- Paste the custom domain (for example, vip.wpaas.pro) in the respective field and click Apply.

Once the SSL certificate is issued, you will be informed via popup and the appropriate email.
- The last step is to make sure all links within your WordPress application point to the custom domain. Open the admin panel using the link and credentials from the successful installation window or respective email. Go to the Settings and check whether the WordPress Address (URL) and Site Address (URL) fields contain the correct custom domain. If required, change it.
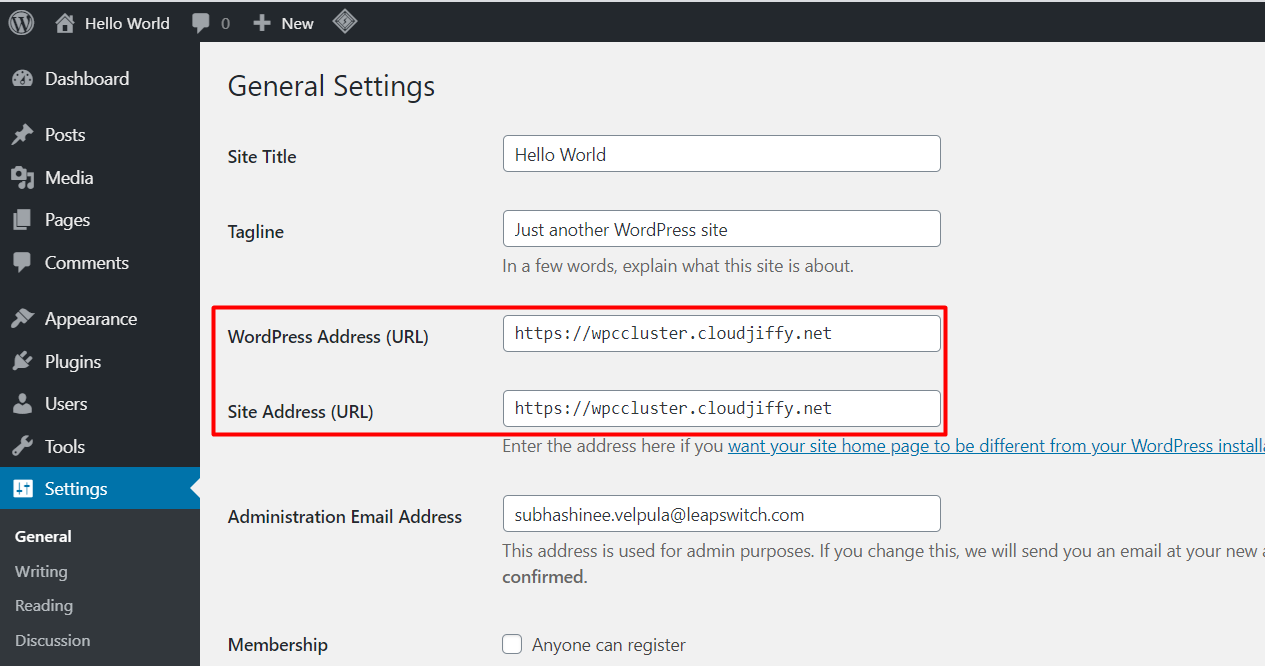
- Finally, click the Save Changes button at the bottom of the Settings page and open the application with a new address.
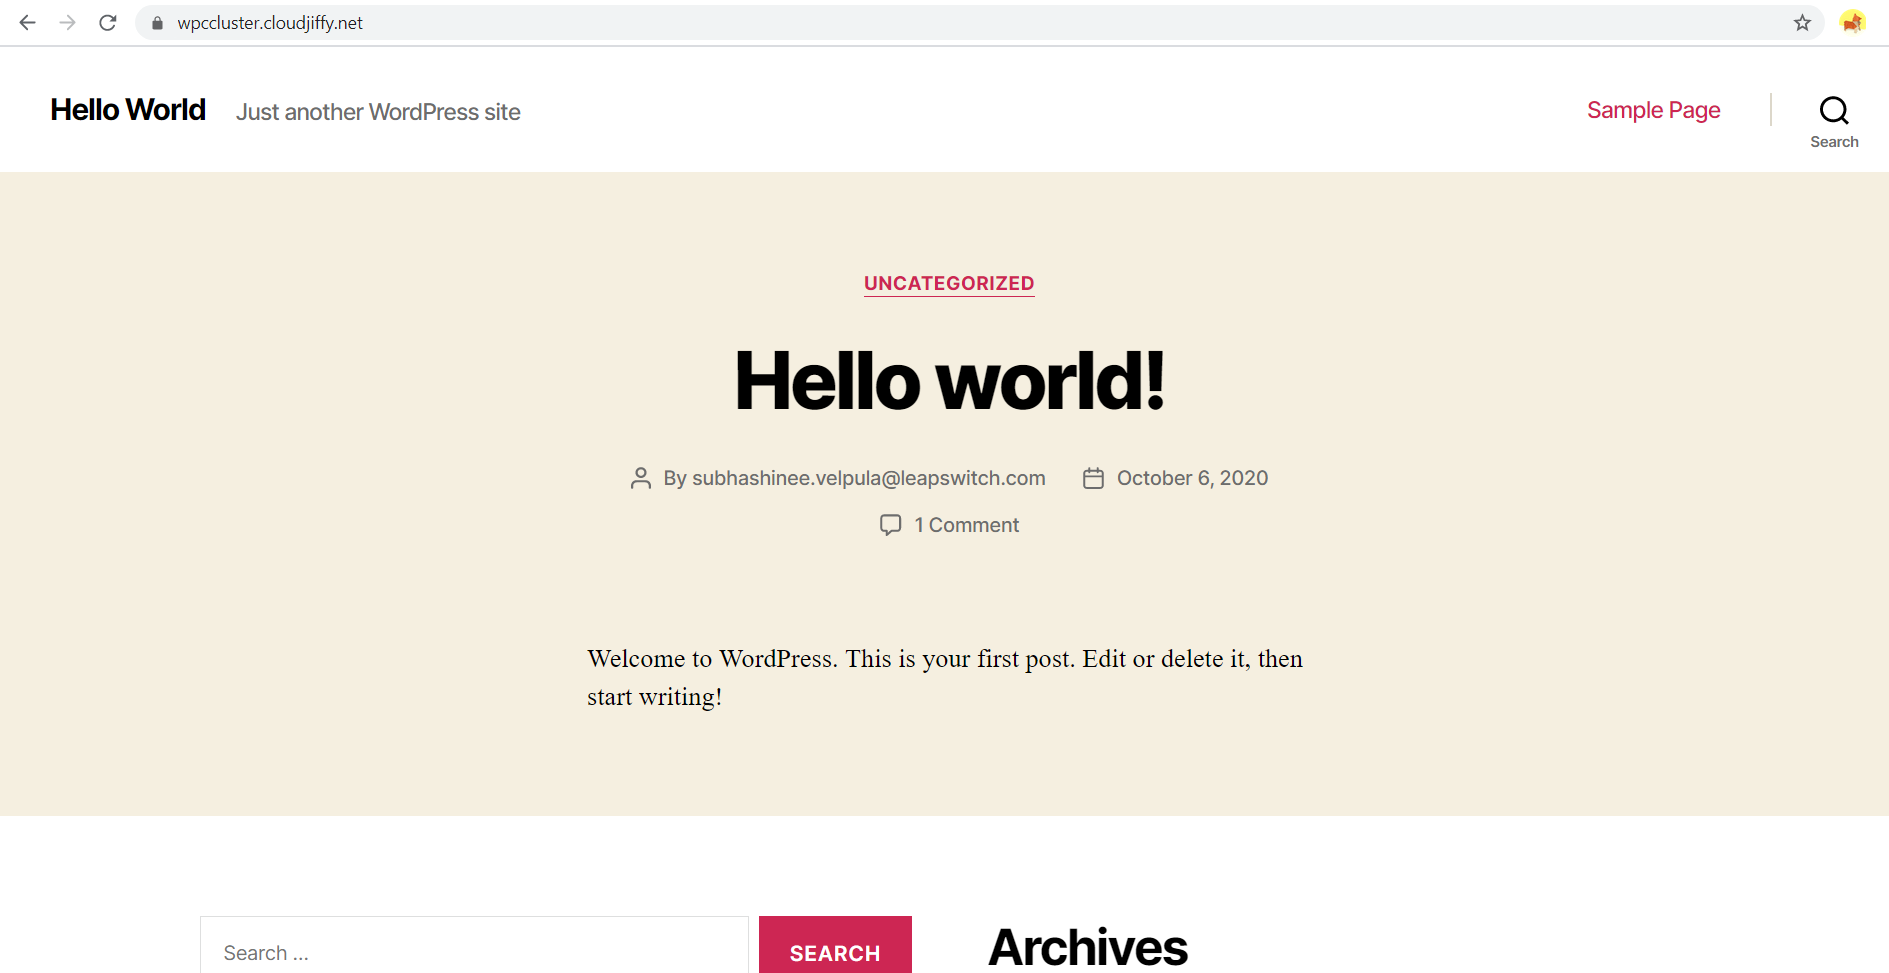
As a result, we got a production-ready WordPress cluster with high-availability capabilities and resistance to the web application security attacks. Extremely advanced performance is ensured by a new generation LiteSpeed application servers, load balancer with fast HTTP/3 protocol support, reliable MariaDB Galera, built-in CDN, and Let’s Encrypt SSL.
Don’t have a CloudJiffy account? Visit https://cloudjiffy.com and click on Free Signup for free 14 days trial.