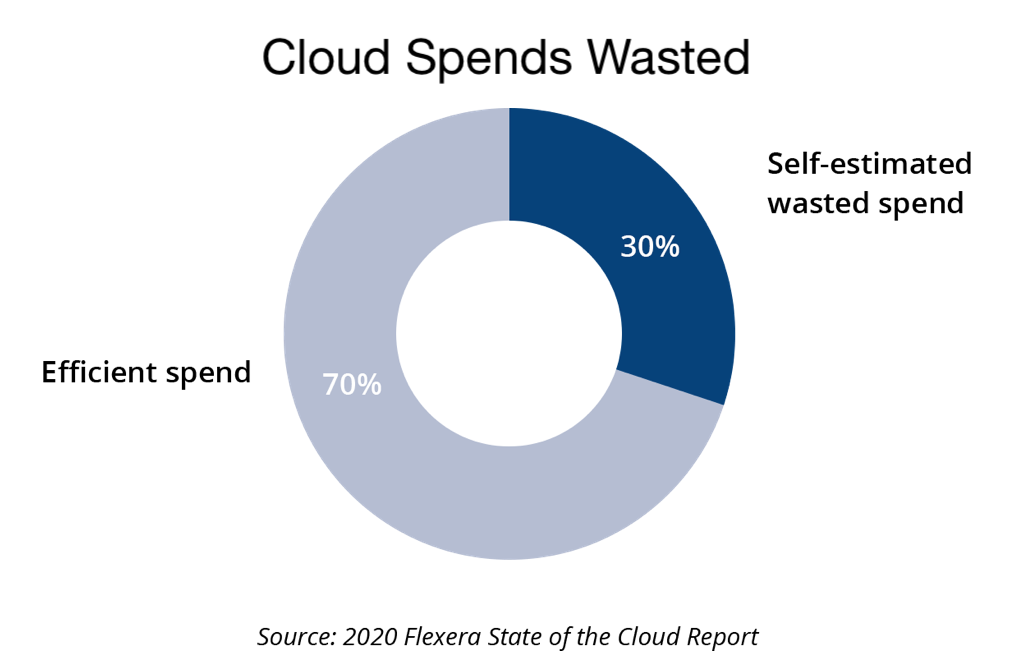
Cloud computing is suitable for both static and dynamic workloads, but with no distinction between them, any user may face a wasteful cloud resources utilization. The self-estimated waste can be about 30%, while after thorough analysis the ratio can reach up to 70% in the case of not “round-the-clock” software environment.
There are different ways to optimize these expenses and save cloud costs in order to apply the released budget in directions that can bring more income or more reward programs for the team. The most widely used are:
- Monitoring utilization and rightsizing instances
- Automating hibernation of temporary workloads
- Shutting down workloads during certain hours
- Selecting cloud or region based on price
Here we will cover scheduling automatic start and stop of workloads. This is one of the most simple but still highly effective solutions to save money while running my development, stage or testing environments in the cloud.
Usually, during such lifecycle stages as development or testing, the environment is not constantly required, like during nighttime or weekends. The waste can be easily noticed in the simple illustration of a week with 5 working days approximately 10 hours each:
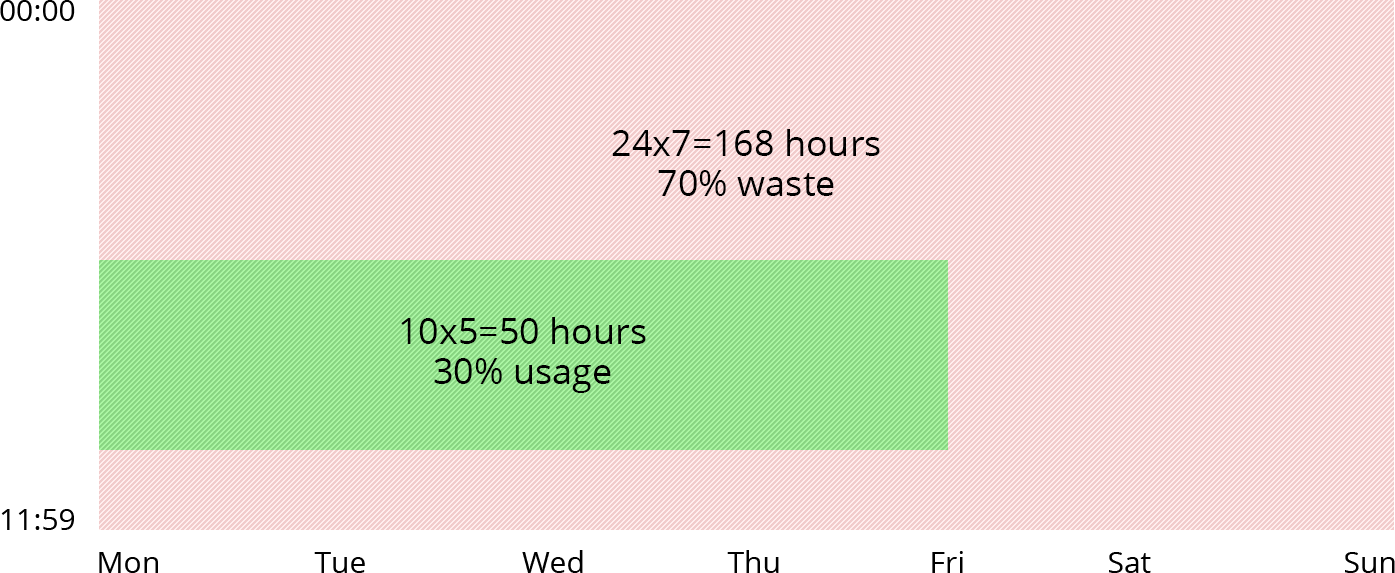
As I see, about 70% of resources are wasted during non-working hours. So it would be a smart decision to stop my environment during such an idling period to cut expenditures. Obviously, doing it manually is an inefficient way of management, so I need to automate the process.
Cloudjiffy has created a scheduler add-on that is designed to automate the stop and start operations for any environment on the cloud platform. Being extremely simple in configuration, it allows to gain considerable savings, especially when working with multiple environments. And to help me with that, below we’ll consider the steps required to install and manage this add-on, as well as a number of possible configurations for the most common use cases with this solution.
Hibernation Scheduler Installation
- The Env Start/Stop Scheduler solution is added as one of the default add-ons at Cloudjiffy Marketplace, thus its installation is a simple and automated process.
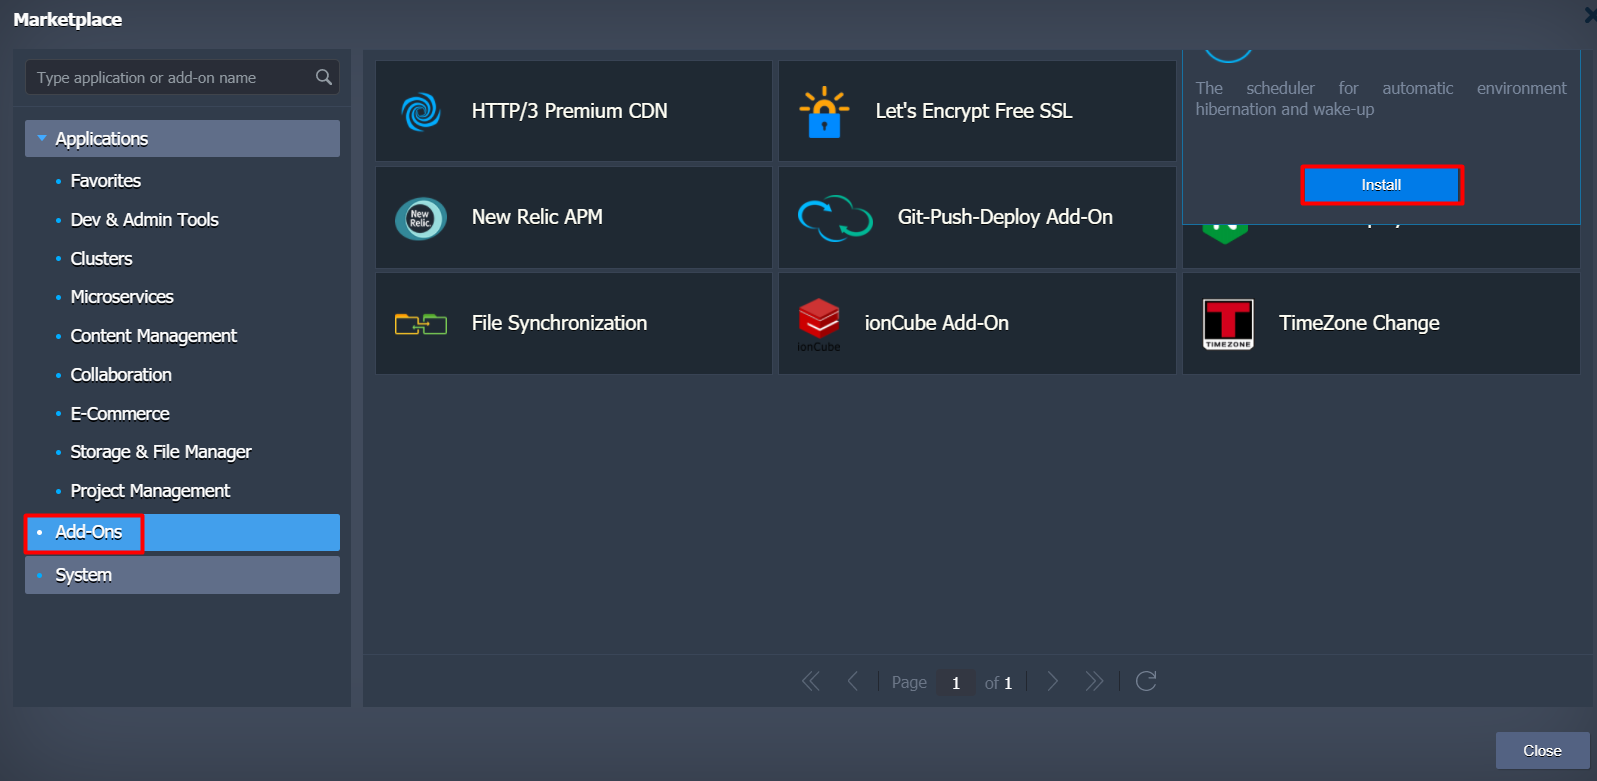
- Log into the dashboard and click the Marketplace button at the top pane.

- Switch to the Add-ons tab and find the Env Start/Stop Scheduler solution. Hover over it and click the appeared Install button.
-
Provide the following data to customise add-on up to my needs:
- Switch on the Stop/Start toggles and specify the time the environment should be stopped/started respectively
- Select days of the week for each action to be applied
Choose a preferable Time Zone
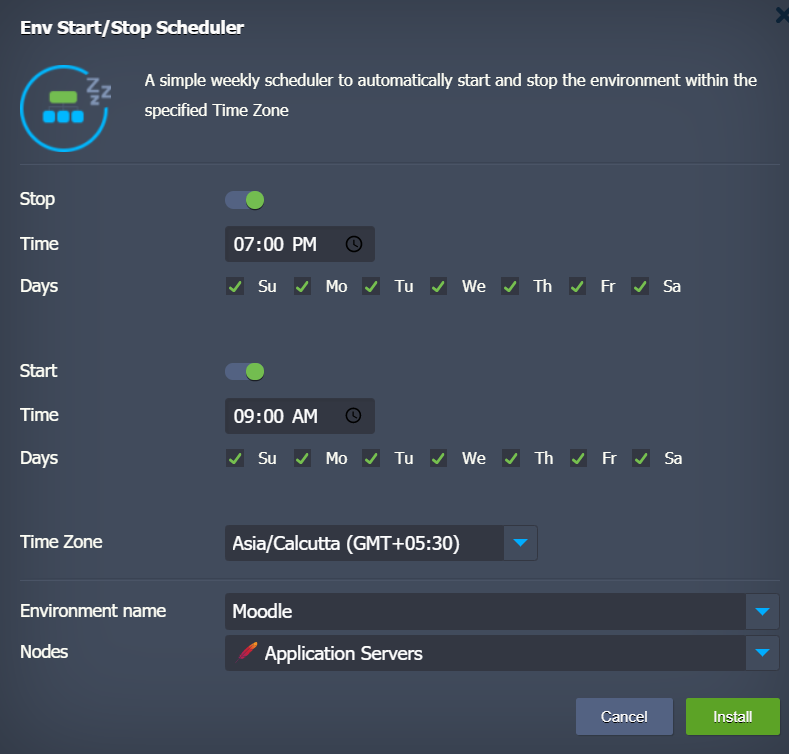
- Environment name - target environment that should be managed by add-on
- Nodes - environment layer the add-on will be installed to; it is fetched automatically upon selecting the environment (we recommend leaving this field with default choice).
Click Install to add a scheduler.
4. In a moment, I’ll see a notification about the operation being completed successfully.
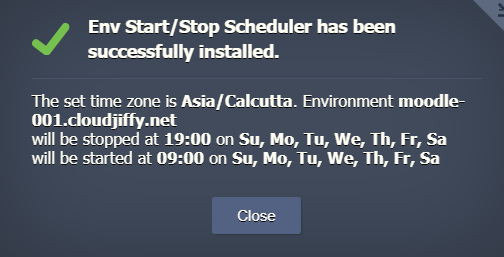
That’s it! The add-on has been installed and is already working, being ready to regulate my environment activity time based on the given schedule in compliance with the Time Zone I choose.
Hibernation Scheduler Management
In case I need to adjust the start / stop conditions after installation, this can be done directly via the dashboard:
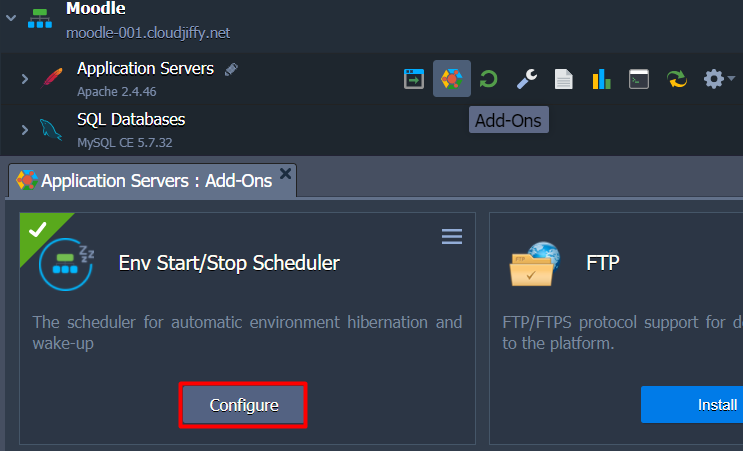
- Click on the Add-Ons icon next to the environment layer, where the solution was installed. Within the opened tab, find the scheduler and select the Configure button.
2. The appropriate frame will be shown, allowing to set new values for the Stop and Start time, Days and Time Zone. For example, I can untick the weekends, so the environments will be fully deactivated during these days.
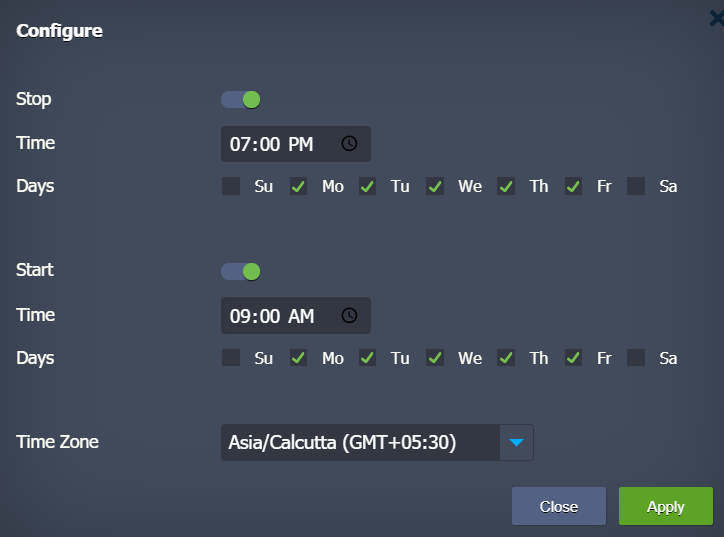
Click Apply to use the changed settings.
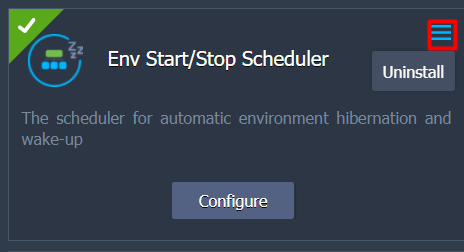
3. When moving a project to production or in case I just don’t need this solution anymore, use the menu at the top right corner of the scheduler configuration to Uninstall it.
That’s all! Now, I know how to reduce cloud waste with automatically scheduled hibernation using Cloudjiffy Env Start/Stop Scheduler add-on. Organize my environment's uptime to maximize resources and funds saving on my testing and development environments running with Cloudjiffy PaaS.
Note: The update does not affect add-ons installed earlier. In case I prefer to use an old add-on version, reach out to the support team at support@cloudjiffy.com. We will configure the old addon for my.
To update to the latest version I need to reinstall the add-on.