The Links section is intended for establishing a connection between my Docker containers (obviously, they should be placed at different layers inside a single environment for that).
After such a connection is set, a container will be able to work with environment variables of the linked template (herewith, the imported properties will have a special prefix to be easily separated from this container’s native ones). As an example, you’ll connect the containers with CloudJiffy example WordPress templates.
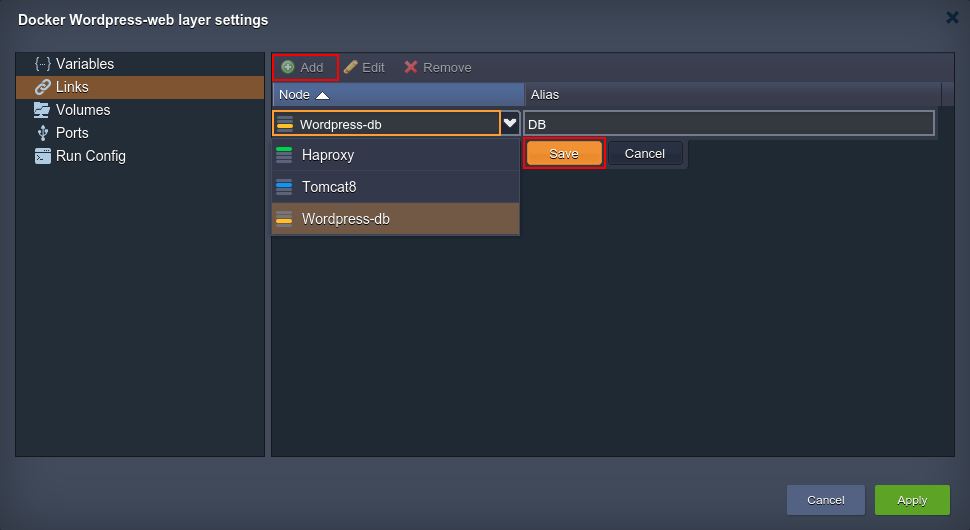
1. To set a new link, click the Add button and fill in the appeared fields:- Node - select the layer with the required image using the drop-down list of ones, available within the current environment
-
Alias - type a connection alias (DB in our case). Subsequently, it will be used as a prefix for the chosen container’s variables, imported to the currently configured one.

Tip: Upon linking Docker containers, CloudJiffy also adds the corresponding DNS record (with the identical to the used alias name) to CloudJiffy DB. In such a way, you can refer to a particular container from inside of these two environment layers not just over its IP address or NodeID, but also specifying the assigned alias with counter, i.e. {alias_name}_N.
For example, after linking with DB alias (as it’s shown above), you can ping specific containers at the appropriate layer as “db_1”, “db_2”, etc while working with Platform internal network via CloudJiffy SSH Gateway. Herewith, if using common layer alias (i.e. without a counter, “DB” in our case), the system will use the Round-Robin algorithm to choose any container within the defined node group.2. After that click Save to confirm linking settings. you can link as many different nodes to a single container as you require.
Note:
- all the stated connections will take effect only after selecting the Apply buttons for this frame and, if needed, for the whole topology wizard
- be aware that the linked nodes will be restarted for the new settings to be applied (causing a short downtime of the appropriate containers)
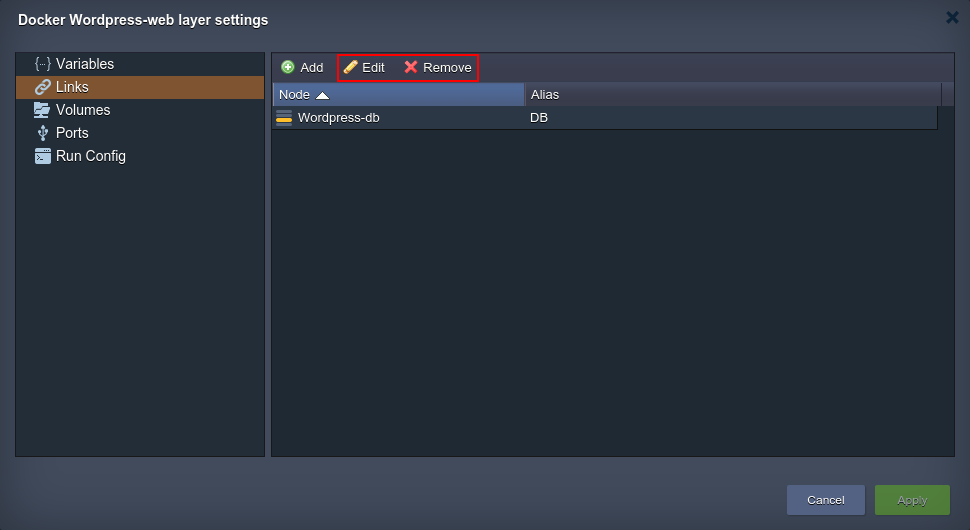
3. You always can Edit or Remove the unnecessary link with the corresponding buttons at the top pane of the Docker layer settings frame.

After the new settings are applied, you can check the results by switching to the Variables section (where the newly imported parameters will be listed).